Transform Your Floors: The Ultimate Guide to Self-Leveling Concrete for a Flawless Finish
Are you tired of uneven, cracked, or outdated floors dragging down the aesthetic of your space? Transforming your floors could be the game-changer you’ve been looking for! Welcome to “Transform Your Floors: The Ultimate Guide to Self-Leveling Concrete for a Flawless Finish.” This comprehensive guide is designed to demystify the process of using self-leveling concrete, offering you the knowledge and confidence to rejuvenate your flooring effortlessly. With self-leveling concrete, you can achieve a smooth, flawless surface that’s visually appealing but also durable and resistant to wear. Whether you’re a DIY enthusiast or a seasoned pro, you’ll find expert tips, step-by-step instructions, and troubleshooting advice tailored to ensure your project succeeds. Say goodbye to the hassle of traditional flooring solutions and embrace a modern, stylish finish that will elevate your home or business. Let’s dive in and unlock the secrets to achieving spectacular flooring results!
Benefits of Using Self-Leveling Concrete
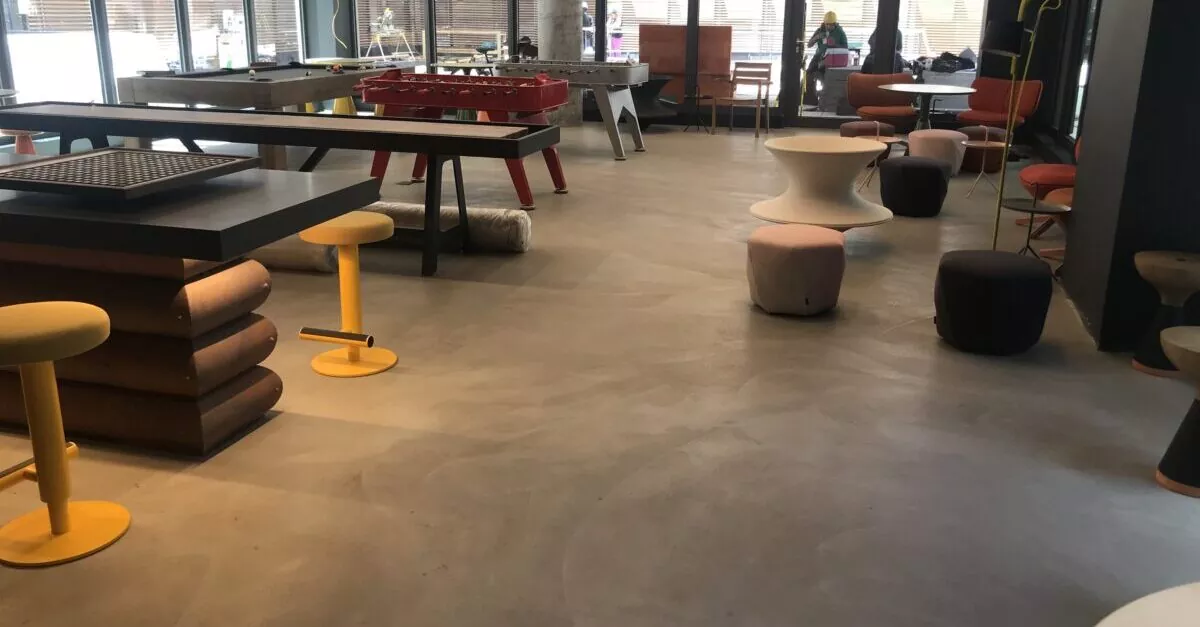
Self-leveling concrete has revolutionized the flooring industry, offering numerous advantages over traditional methods. One of the most significant benefits is its ability to create an impeccably smooth and even surface. Traditional concrete can be labor-intensive and often requires much effort to achieve a level finish. In contrast, self-leveling concrete flows easily and settles into an even layer, eliminating the need for extensive manual leveling. This results in a flawless finish that enhances the aesthetic appeal of any space.
Another key benefit is the durability and longevity of self-leveling concrete. Once cured, it forms a firm, resilient surface that can withstand heavy foot traffic, making it ideal for residential and commercial spaces. Its self-healing properties mean minor cracks and imperfections can often repair themselves, significantly reducing maintenance requirements. Additionally, its resistance to moisture and staining makes it a practical choice for areas prone to spills or dampness, such as kitchens and bathrooms.
Another significant advantage is ease of application. Self-leveling concrete can be applied over various subfloors, including wood, concrete, and tile, without extensive preparation. This versatility makes it an excellent choice for renovation projects where the existing floor might be uneven or damaged. Moreover, the quick drying time of self-leveling concrete means that projects can be completed faster, minimizing disruption to your home or business.
Types of Self-Leveling Concrete
Understanding the different types of self-leveling concrete is crucial for selecting the right product for your project. There are two primary categories: underlayment and topping. Self-leveling underlayment is designed to be used beneath other flooring materials, such as tile, carpet, or hardwood. It creates a smooth, level base that ensures the final floor covering will be even and stable. This type of self-leveling concrete is ideal for addressing minor imperfections and providing a solid foundation for further flooring installations.
On the other hand, self-leveling topping is intended to be the final surface layer. It can be left exposed and polished to create a sleek, modern look. Toppings are available in various colors and finishes, allowing creative design possibilities. This type of self-leveling concrete is perfect for spaces where you want a durable yet visually appealing floor, such as lofts, retail stores, or industrial-style homes. Choosing between underlayment and topping depends on your specific requirements and the desired outcome of your project.
Additionally, there are specialized self-leveling concrete products designed for specific applications. For example, fiber-reinforced self-leveling concrete contains fibers that enhance its strength and crack resistance, making it suitable for heavy-duty areas. Fast-setting self-leveling concrete is another option, allowing quicker project completion by reducing the drying time. By understanding the various types of self-leveling concrete available, you can make an informed decision that aligns with your project’s needs and goals.
Preparing Your Subfloor for Self-Leveling
Proper subfloor preparation is essential for achieving the best results with self-leveling concrete. The first step is to thoroughly clean the existing floor to remove any dirt, dust, or debris that could interfere with the bonding process. Sweep and vacuum the area, then wash it with a suitable cleaner to ensure it is entirely contaminant-free. Any grease or oil stains should be treated with a degreaser to prevent adhesion issues.
Next, inspect the subfloor for cracks, holes, or uneven areas. Small cracks and holes can be filled with a patching compound, while larger imperfections may require more extensive repair. Ensure the subfloor is structurally sound and free from loose or crumbling material. If you are working with a wooden subfloor, check for any signs of rot or water damage and replace any affected sections as needed.
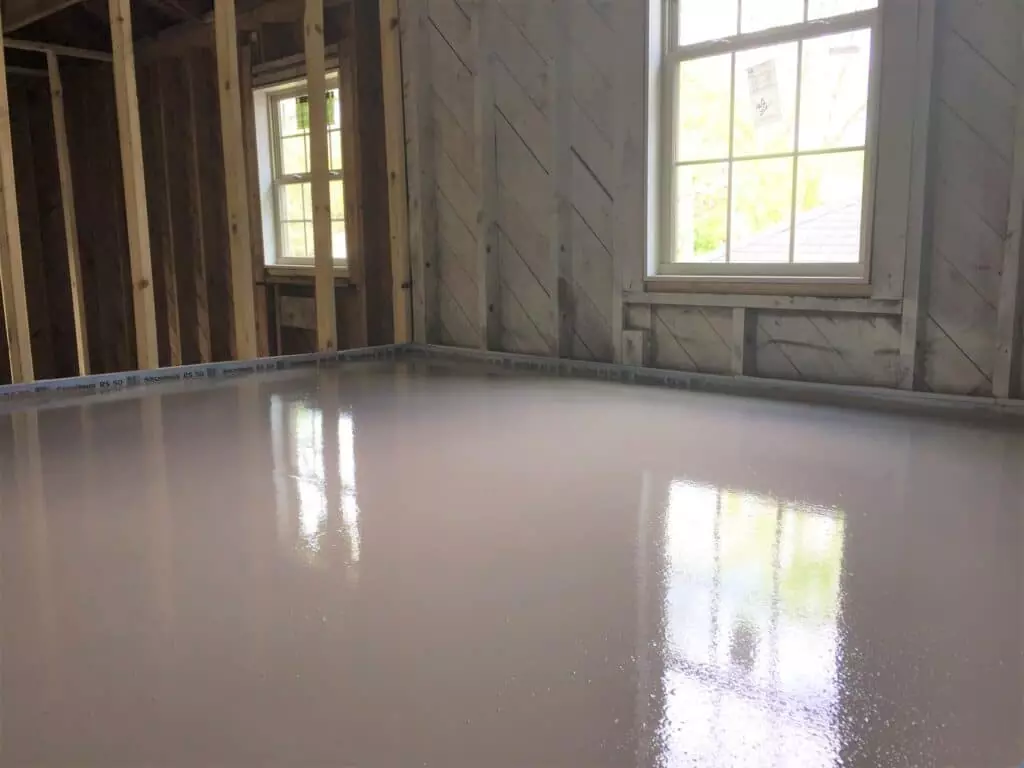
Before applying self-leveling concrete, it is crucial to prime the subfloor. A primer helps to enhance the bond between the self-leveling compound and the subfloor, ensuring a strong and durable finish. Choose a primer compatible with the subfloor material and the self-leveling concrete product you use. Apply the primer according to the manufacturer’s instructions, and allow it to dry completely before proceeding with the self-leveling process.

Step-by-Step Guide to Applying Self-Leveling Concrete
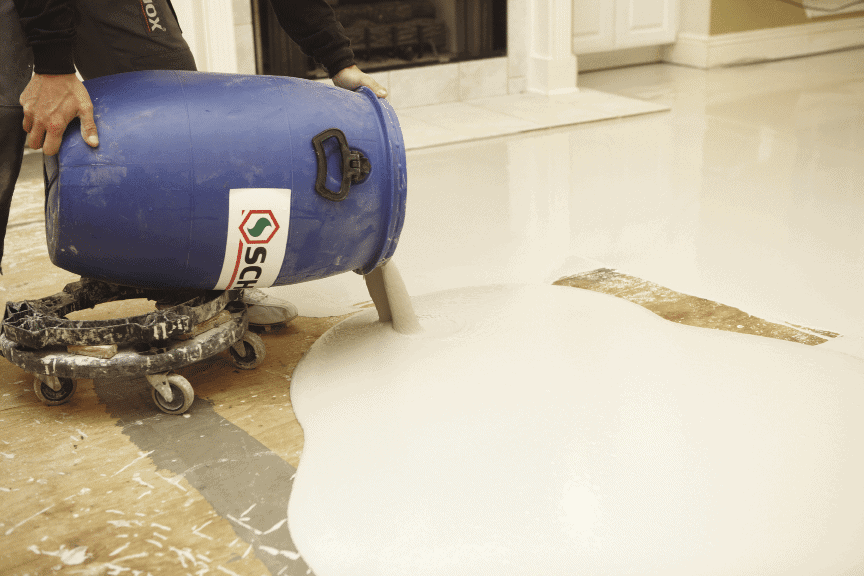
Applying self-leveling concrete may seem daunting, but following a systematic approach can help you achieve professional results. Start by gathering all the necessary tools and materials, including a mixing bucket, a drill with a mixing paddle attachment, a trowel, and a spiked roller. It’s essential to have everything ready before you begin, as the process moves quickly once the concrete is mixed.
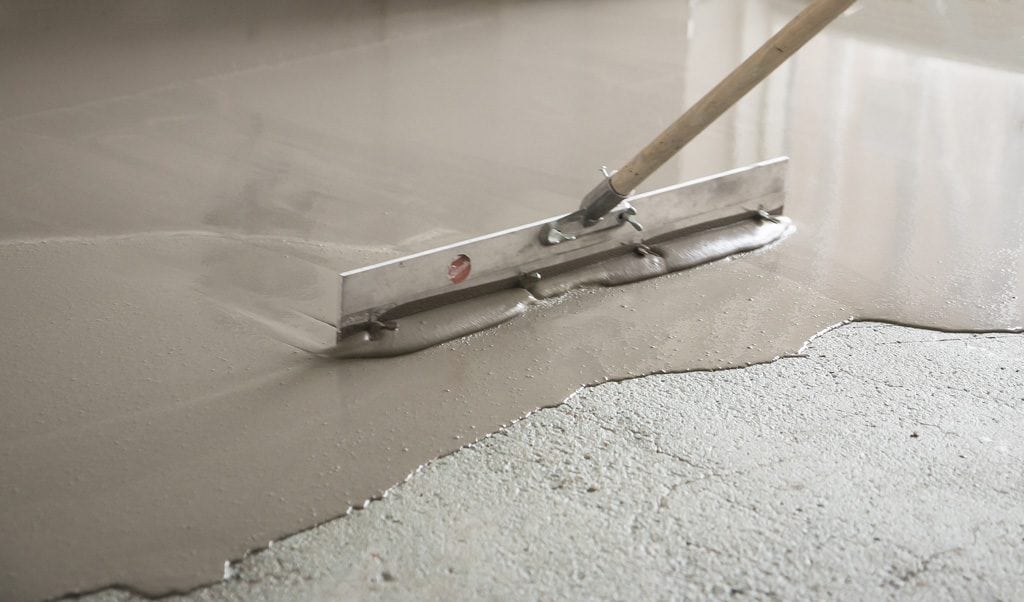
Begin by mixing the self-leveling concrete according to the manufacturer’s instructions. Use the drill and mixing paddle to ensure a smooth, lump-free consistency. Pour the mixed concrete onto the prepared subfloor, starting at the farthest corner of the room and working your way towards the exit. Use a trowel to spread the concrete evenly, ensuring it flows into all corners and around any obstacles.
Once the concrete is spread, use a spiked roller to remove air bubbles and ensure a uniform surface. Work quickly, as the concrete will start to set within minutes. Allow the self-leveling concrete to cure according to the manufacturer’s recommendations before walking on it or applying any additional flooring materials. This curing period is crucial for achieving a strong and durable finish.
Common Mistakes to Avoid
While self-leveling concrete is designed to be user-friendly, common mistakes can compromise the final result. One of the most frequent errors is improper subfloor preparation. Failing to thoroughly clean and prime the subfloor can lead to poor adhesion and a weak bond, resulting in a compromised finish. Always take the time to ensure the subfloor is clean, dry, and properly primed before applying self-leveling concrete.
Another common mistake is incorrect mixing of the self-leveling concrete. Mixing too much or too little water can affect the consistency and performance of the product. Follow the manufacturer’s instructions carefully, and use a drill with a mixing paddle to achieve a smooth, homogenous mixture. Avoid mixing more concrete than you can apply within the working time, as it can begin to set before you can spread it evenly.
Lastly, inadequate finishing techniques can result in an uneven or flawed surface. Failing to use a spiked roller to remove air bubbles and ensure a uniform finish can lead to imperfections in the final result. Additionally, insufficient curing time before walking on the surface or applying additional flooring materials can weaken the finish. Patience and attention to detail are key to avoiding these common pitfalls and achieving a flawless floor.
Tools and Materials Needed for the Job
The right tools and materials are essential for a successful self-leveling concrete project. You’ll need a high-quality self-leveling concrete mix appropriate for your application, whether underlayment or topping. A primer compatible with the subfloor and self-leveling concrete is also necessary to ensure proper adhesion.
A heavy-duty drill with a mixing paddle attachment is recommended for mixing the concrete. This will help achieve a smooth, lump-free consistency. You’ll also need a large mixing bucket to accommodate the volume of concrete you’ll be working with. A trowel is essential for spreading the concrete evenly, ensuring it flows into all corners and around any obstacles.
A spiked roller is critical for removing air bubbles and ensuring a uniform finish. You’ll also need spiked shoes or cleats to walk on the wet concrete without disturbing the surface. Other useful tools include a measuring tape, a level, and protective gear such as gloves and safety glasses. Having all these tools and materials before you begin will help ensure a smooth and efficient application process.
Maintaining Your Self-Leveling Concrete Floors
Once you’ve achieved a flawless finish with self-leveling concrete, proper maintenance is key to preserving its appearance and durability. Regular cleaning is essential to prevent dirt and debris from accumulating on the surface. Sweep or vacuum the floor regularly to remove loose particles, and use a damp mop with a mild cleaner for more thorough cleaning. Avoid harsh chemicals or abrasive cleaners, as these can damage the finish.
In addition to regular cleaning, it’s essential to address spills and stains promptly. Self-leveling concrete is resistant to moisture and staining, but prolonged exposure to liquids can still cause damage. Wipe up spills immediately and use a pH-neutral cleaner to remove any stains. A light scrubbing with a soft brush may be necessary for stubborn stains.
Periodic resealing can also help maintain the appearance and durability of your self-leveling concrete floors. Depending on the level of traffic and wear, you may need to reseal the floor every few years. A high-quality sealer will protect the surface from moisture, stains, and scratches, ensuring your floor remains in top condition for years. Regular maintenance and care will help you enjoy the benefits of self-leveling concrete for the long term.
Cost Considerations and Budgeting
When planning a self-leveling concrete project, it’s essential to consider the costs and budget accordingly. The cost of self-leveling concrete can vary depending on the type and quality of the product you choose. Generally, self-leveling underlayment is less expensive than self-leveling topping, as it is intended to be covered with another flooring material. However, high-quality toppings designed for use as the final surface layer can be more costly.
In addition to the cost of the self-leveling concrete itself, you’ll need to factor in the price of other materials, such as primer, tools, and protective gear. If you don’t already own the necessary tools, you may need to purchase or rent them, which can add to the overall cost. It’s also important to consider the cost of any subfloor repairs or preparation required before applying the self-leveling concrete.
Labor costs can also be significant if you hire a professional to complete the project. While self-leveling concrete is designed to be user-friendly and suitable for DIY projects, hiring a professional can ensure a flawless finish and save you time and effort. Be sure to obtain multiple quotes and compare the costs and services offered by different contractors. By carefully considering all these factors and budgeting accordingly, you can ensure a successful and cost-effective self-leveling concrete project.
Conclusion and Final Thoughts
Transforming your floors with self-leveling concrete can be a game-changer. It offers a smooth, flawless finish that enhances the aesthetic and functionality of any space. Whether addressing uneven surfaces, updating an outdated floor, or creating a modern, polished look, self-leveling concrete provides a versatile and durable solution. By understanding the benefits, types, and application process, you can confidently tackle your flooring project and achieve professional results.
Proper subfloor preparation, carefully mixing and applying the self-leveling concrete, and attention to detail during the finishing process are all critical for success. Avoiding common mistakes and using the right tools and materials can significantly affect the final outcome. Regular maintenance and care will also help preserve the appearance and durability of your self-leveling concrete floors for years.
Whether you’re a DIY enthusiast or a seasoned pro, self-leveling concrete offers a practical and stylish flooring option that can elevate the look and feel of your home or business. By following the guidance and tips in this ultimate guide, you can confidently transform your floors and enjoy the many benefits of a flawless, self-leveling concrete finish. Embrace the possibilities and unlock the secrets to spectacular flooring results!
Call DUOMIT today to learn how to repair your existing slab and about Transforming Commercial Spaces with Epoxy Flooring’s Durability and Elegance.